

OK, there are 2 important things:
2 důležité věci:
1) I lost 2 of the 3 pattern pieces. But it seems I had the back piece drawn on the front piece (for some reason O_o), and it looks the same as my photos and the actual blouse, so I hope it really is the case. What that means - I think the pattern instructions are alright.
2) I'm not writing this in Word first, so I might happen to make more mistakes then usually, sorry for that. m(-.-)m
1) Ztratila jsem dva díly střihu ze tří, což je skutečně smutné. Ale zadní díl jsme evidentně měla nakreslený na předním (proč, to nevím O_o) a vypadá stejně jako na fotkách i na ušité blůze, takže snad je to on a tudíž jsou snad následující instrukce správné.
2) Výjimečně nepíšu článek nejdřív ve wordu, tak se omlouvám za zvýšené množství chyb a překlepů. m(-.-)m
The pattern
The pattern will fit a girl who's the same size as me (34/36) or smaller comfortably. If you're bigger, simply adjust the pattern to your needs - it's so simple that It should be fine even if you just make it a bit wider without further modifications. Something you should take note of too - my waist and my underbust area are almost the same - if you happen to have a bit wider bust (not boobs, the actual bones), you'll have to adjust that. I think the measurements (in cm) should be enough for you to figure out how to draw it. Obviously, the straight lines are center folds. For the collar, just put the two pieces shoulders together and draw the collar. Naturally, even though my drawing sucks, except for the front part, it should be the same width all the way round.
Střih:
Bude sedět slečnám s podobnou velikostí (34/36) nebo menší. Pokud máte větší velikost, tak si střih snadno přizpůsobíte - je tak jednoduchý, že by mělo stači - teda alespoň v určitém rozmězí velikostí - jej prostě jen rozšířit. Co je poměrně důležité pro všechny ale je, že mám drobný hrudník (nejen prsa, ale i hrudní koš), takže mám v pase a pod prsy stejný obvod. Pokus se váš hrudník nahoru rozšiřuje, doporučuji příslušně tomu rozšířit především zadní díl. Pro narýsování límce prostě jen složte oba díly rameny k sobě a obkreslete. Kromě přední části by pak už měl mít všude stejnou šířku, i když to z mého mizerného náčrtku tak nevypadá.


You'll need about 70 cm of chiffon, a piece of lining and a piece of lace (for the collar, so it's gonna be roughly 50 x 50 cm).
Budete potřebovat asi 70 cm šifonu a kousky látek na límec - podšívku u krajku - cca 50 x 50 cm.
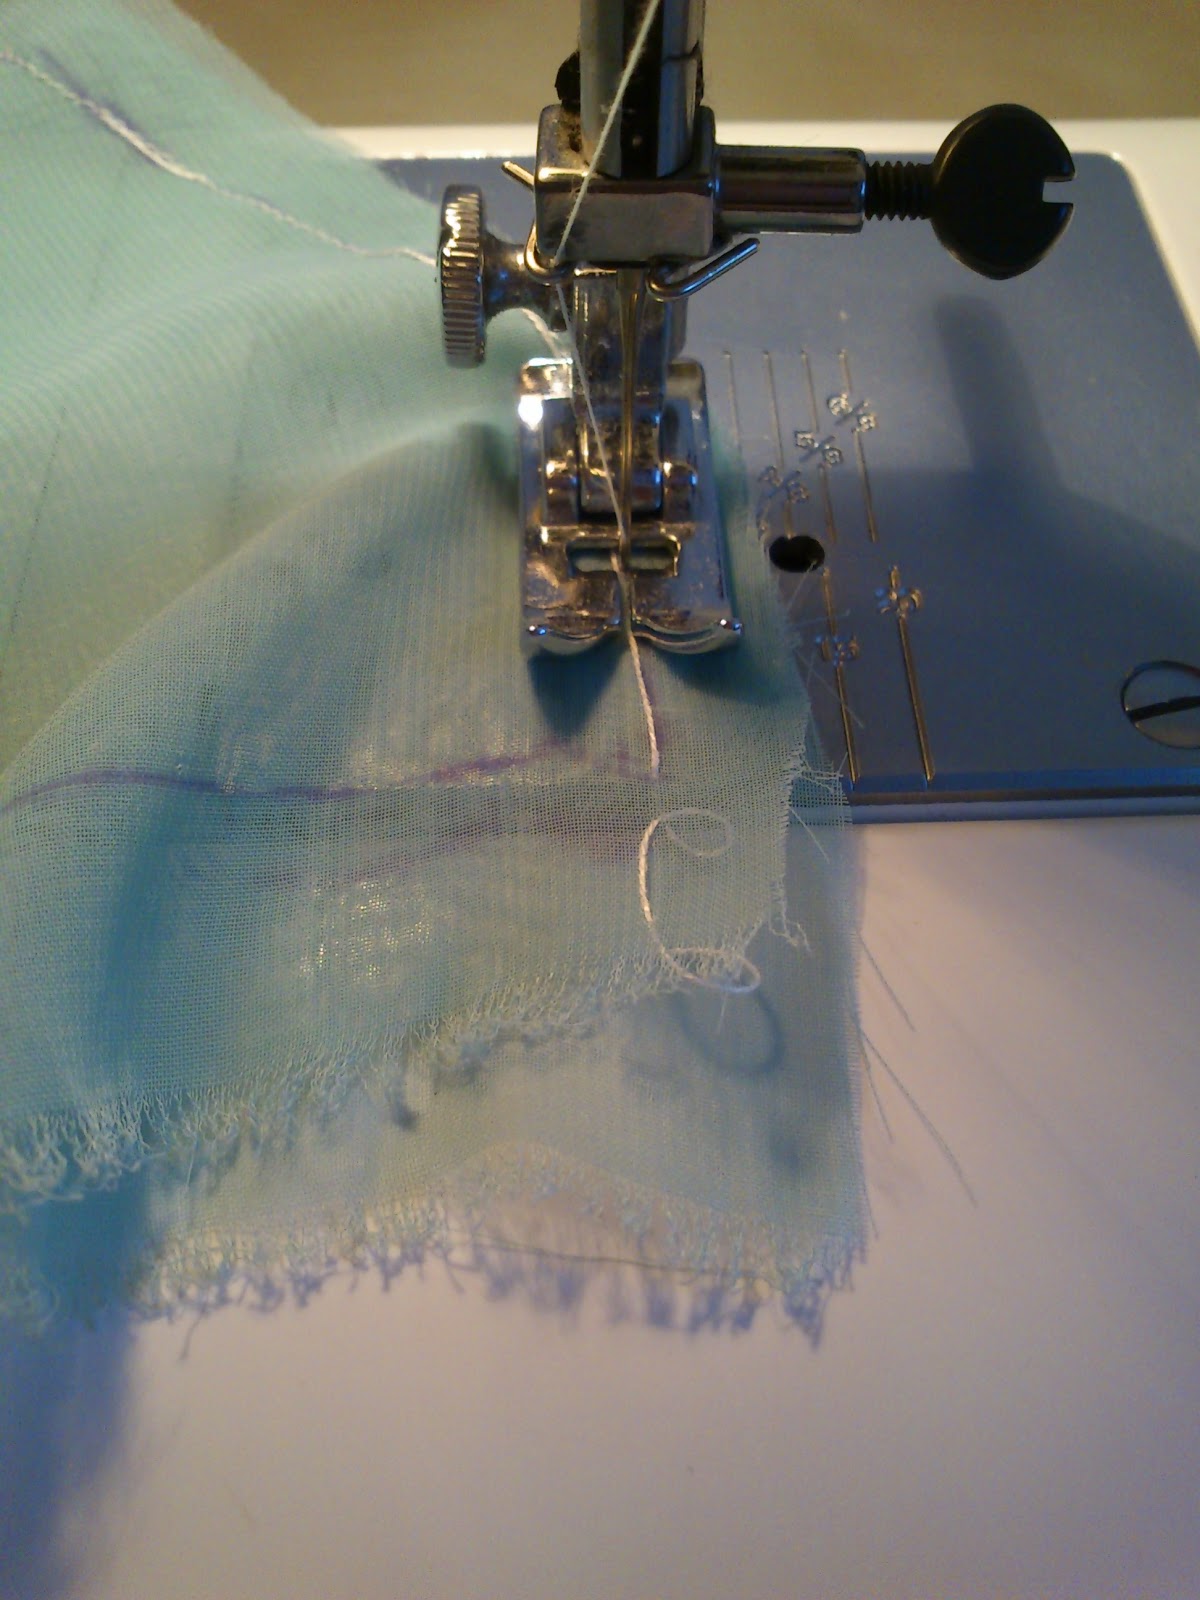
1) Now that you have the pattern, fold the fabric, pin the pattern down, trace around it with a deletable marker (since it's see-through fabric, it's easy to trace even the side that's underneath). Do this for the front and back pieces.
Složte látku, našpendlete na ni střih obkreslete ho vyzmizíkovatelnou fixou na látku (jelikož je ta látka průhledná, snadno označíte obě strany, i tu vespod). To se týká předního i zadního dílu.


2) Cut it out - leave about 1 - 1,5 cm on the sides and shoulders, 2 cm on the arm holes and 3 cm on the bottom.
Vystříhněte - nechte asi 1 - 1,5 cm na přídavky na švy na stranách a ramenech, asi 2 cm u průramků a 3 cm dole.


3) Take off the pattern and put the pieces right sides facing each other. Generally, the right side looks more neat and also, if the fbric has perforation on the sides, the holes go from the right side to the wrong side. So the side with a rough surface on the sides is the wrong one. If you can't tell them apart no matter what, just pick the one you think looks prettier.
Sundejte střih a položte díly lícem na sebe. Lícová strana látky je ta hezčí, pokud je na látce po straně perforování tak ta, z ních jdou dírky na tu druhou (tzn. rub má hrubší okraj, protože tam dírky ústí). Pokud to fakt nejde rozeznat, prostě za líc určete tu, co se vám víc líbí.

4) Stitch the shoulders and sides together.
Sestehujte ramena a strany k sobě.


5) Sew it on the machine.
A sešijte to na stroji.
6) With a zig zag stitch, sew around the allowance. That will keep the fabric from fraying. I felt that zig zag stitch is better than overlocking since the fabric is so thin.
Cik cak stehem obšijte přídavky právě sešitých částí, aby se netřepily. U lehkých látek mi to připadá lepší než overlock.


7) Fold the armholes for about 1 cm and stitch.
Ohněte průramky asi o 1 cm a prostehujte.

8) Fold again and stitch. This way, you'll conceal the edges and keep it from frayin. It will also look neater when worn.
Znovu ohněte a sestehujte. tím zabráníte třepení a bude to vypadat líp při nošení.

9) Sew it on the machine.
Prošijte na stroji.

10) Cut the collar pieces from the lining and the lace. If you can spare the fabric, it's better to have a fold in the center, not cut it into two pieces.
Vystřihněte díl límce z podšívky i krajky, je lepší mít vzadu přehyb látky, než to sešívat ze dvou dílů.


11) Trace around it with the marker, take the pattern off and cut the allowance as you see in the picture. Be sure not to cut into the line you draw.
Obtáhněte fixou, sundejte střih a nastříhejte dle obrázku. Hlavně neprostřihněte tu čáru.

12) Fold (ironing helps) the inner allowance (the side that's going to be sewn to the neckline) and stitch.
Ohněte do rubu (sežehlení pomůže) stranu, která bude u krku (ten menší kruh) a nastehujte.

13) Put the pieces right sides together and pin the outer circles together.
Položte podšívku a krajku lícem k sobě a natsehujte tu druhou stranu.

14) Sew it on the machine, but don't start at the very end - leave about 1 cm unsewn. That way, you'll be able to sew it onto the neckline easily. Turn it right side up and iron, sew a line of longer stitch to press it and make it lie down. Again, don¨t start at the beginning, leave the 1 cm space unsewn.
Prošijte na stroji, ale nezačínejte hned od kraje - vynechte na obou stranách asi 1 cm, abyste to pak mohli přišít k výstřihu. Otočte na líc, sežehlete a prošijte podél spodního okraje límce. Ovšem opět nezačínejte hned u kraje.

15) Now, put the neckline inside the space between the lining and the lace. Since you traced around the nekcline, it should be pretty clear how far you have to push the fabric inside. This is also why you left the center part of the collar unsewn - otherwise you couldn't put the allowance inside. Take your time with this - pin and stitch and make sure you're pinning it so that the alce will end up looking upwards!
Nyní vsuňte výstřih do prostoru mezi podšívkou a krajkou. Jelikož tam máte tu čáru udělanou podle střihu, váte, jak hluboko máte sunout. Dělejte to pečlivě - abyste měli střed límce na středu halenky, aby se nic nekrčilo atd. Špendlete a stehujte. A hlavně si dejte pozor, aby vám ve výsledku krajka koukala nahoru!


16) Sew it on the machine and then stitch the collar to the blouse and sew around the neckline to make it lie flat.
Ušijte na stroji, přistehujte límec k halence a prošijte těsně podél výstřihu, aby to leželo.

17) Sew in hand the parts you left unsewn in case they need it and sew on a little bow in case you cneter ended up being a bit messed up.
V ruse sešijte, co jste předtím nechali nesešité. Pokud jste při šití trochu čuňata, našijte doprostřed mašličku.


Done:
Hotovo:


Yours truly
Vita
Ta je prostě fantastická! Škoda, že jsem takové poleno a ani podle takto podrobného návodu bych to nikdy nezvládla ušít. :D
ReplyDeleteAle zvládla ;)
DeleteHi Vita! I have been away from the blog world for the past few days so I wasn't able to comment on this more-than-awesome tutorial! Do you remember the fabric I brought the other day? this is exactly what I wanted to do with it. And I probably skip the necklace because there is already a print in the fabric but I am in love with the model! I can't wait for the holidays so I can make my own clothes!
ReplyDeleteAnd it looks so easy! Thank you so so much for this! ^^
I'm looking forward to seeing the shirt you plan to make!
Delete